Posted on

Camera tracking

Martin Volovar

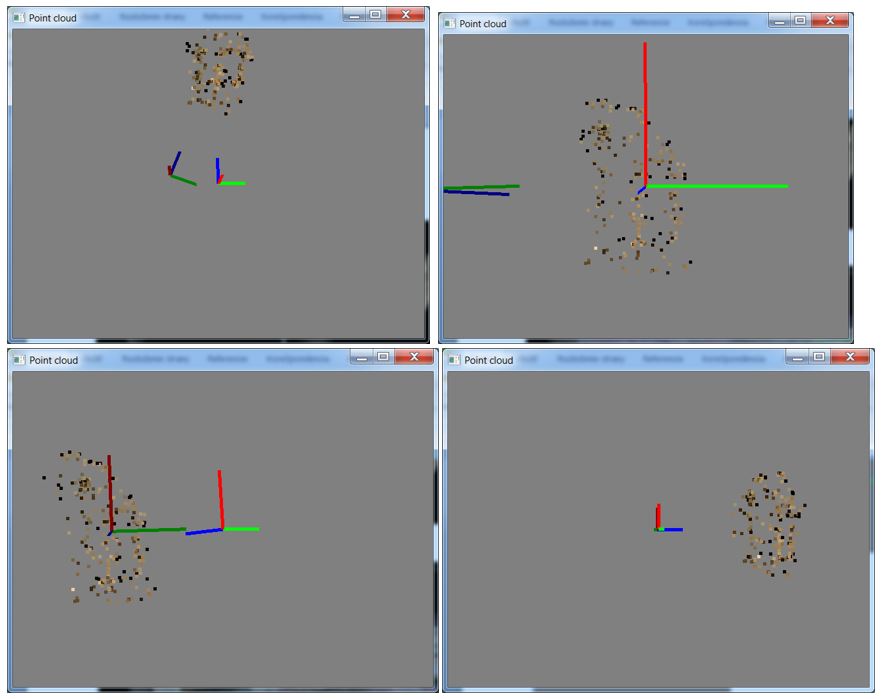
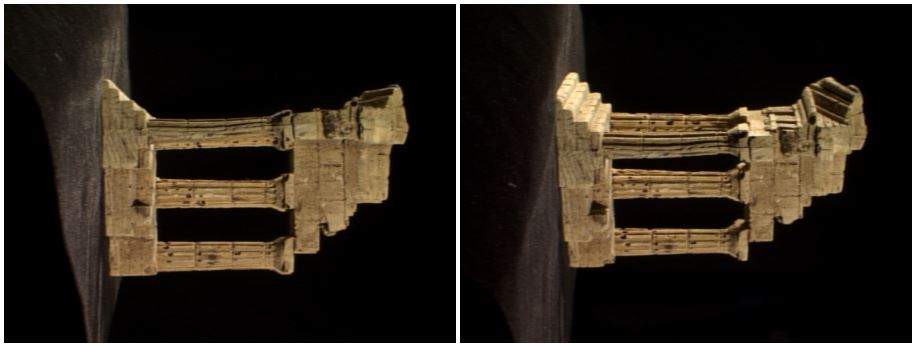
Camera tracking is used in visual effects to synchronize movement and rotation between real and virtual camera .This article deals with obtaining rotation and translation from two images and trying to reconstruct scene.

  1. First we need find keypoints on both images:
    SurfFeatureDetector detector(400);
    vector<KeyPoint> keypoints1, keypoints2, findKeypoints;
    detector.detect(img1, keypoints1);
    detector.detect(img2, keypoints2);
    
    SurfDescriptorExtractor extractor;
    extractor.compute(img1, keypoints1, descriptors1);
    extractor.compute(img2, keypoints2, descriptors2);
    
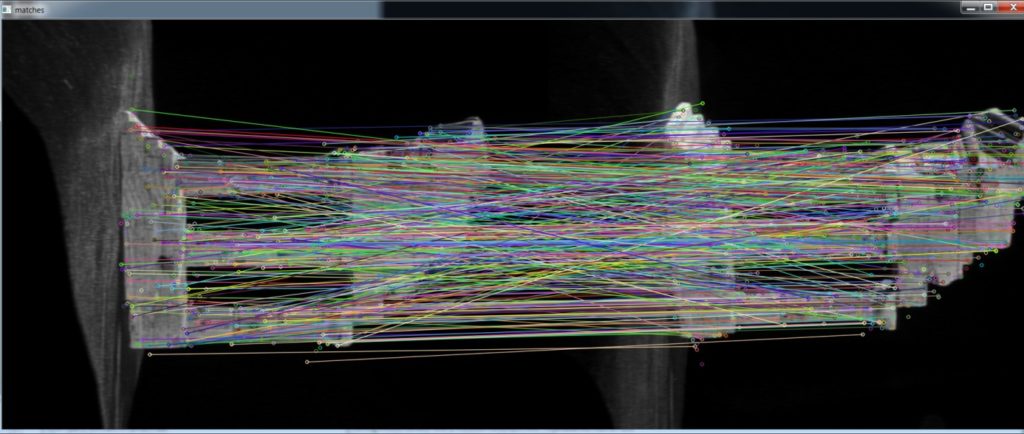
  2. Then we need find matches between keypoints from first and second image:
    cv::BFMatcher matcher(cv::NORM_L2, true);
    vector<DMatch> matches;
    matcher.match(descriptors1, descriptors2, matches);
    

    volovar_matches

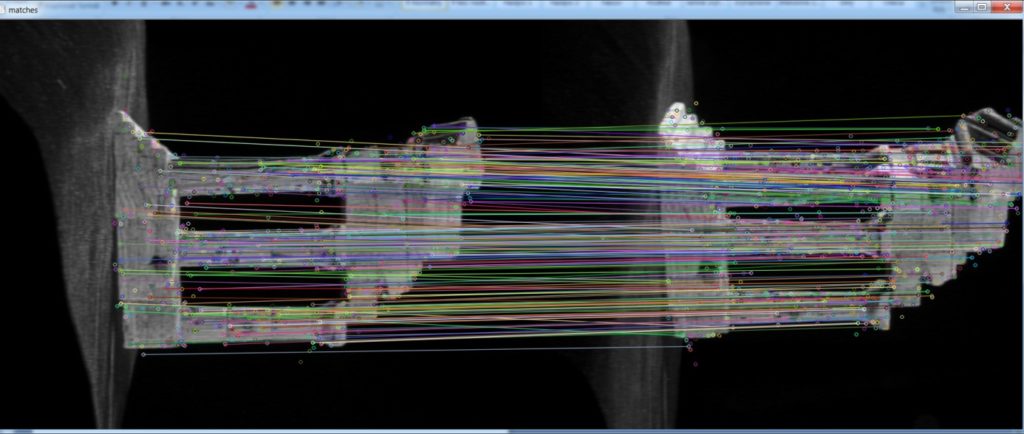
  3. Some keypoints are wrong so we use filtration:
    x = ABS(x);
    y = ABS(y);
    		
    if (x < x_threshold && y < y_threshold)
    	status[i] = 1;
    else
    	status[i] = 0;
    

    volovar_filtered_matches

  4. After that we can find dependency using FM:
    Mat FM = findFundamentalMat(keypointsPosition1, keypointsPosition2, FM_RANSAC, 1., 0.99, status);
    

    we can obtain essential matrix using camera internal parameters (K matrix):

    Mat E = K. t() * FM * K;
    
  5. Using singular value decomposition we can extract camera rotation and translation:
    SVD svd(E, SVD::MODIFY_A) ;
    Mat svd_u = svd. u;
    Mat svd_vt = svd. vt;
    Mat svd_w = svd. w;
    Matx33d W(0, -1, 0,
    1, 0, 0,
    0, 0, 1) ;	
    	
    Mat R = svd_u * Mat(W) * svd_vt;
    Mat_<double> t = svd_u. col(2) ;
    

    Rotation have two solutions (R = U*W*VT or R = U*WT*VT), so we check if camera has right direction:

    double *R_D = (double*) R.data;
    if (R_D[8] < 0.0)
    	R = svd_u * Mat(W.t()) * svd_vt;
    

    To construct rays we need inverse camera matrix (R|t):

    Mat Cam(4, 4, CV_64F, Cam_D);
    Mat Cam_i = Cam.inv();
    

    Both lines have one point in camera center:

    Line l0, l1;
    l0.pos.x = 0.0;
    l0.pos.y = 0.0;
    l0.pos.z = 0.0;
    	
    l1.pos.x = Cam_iD[3];
    l1.pos.y = Cam_iD[7];
    l1.pos.z = Cam_iD[11];
    

    Other point is calculated via projection plane.
    Then we can construct rays and find intersection from each keypoint:

    getNearestPointBetweenTwoLines(pointCloud[j], l0, l1, k);
    

Results

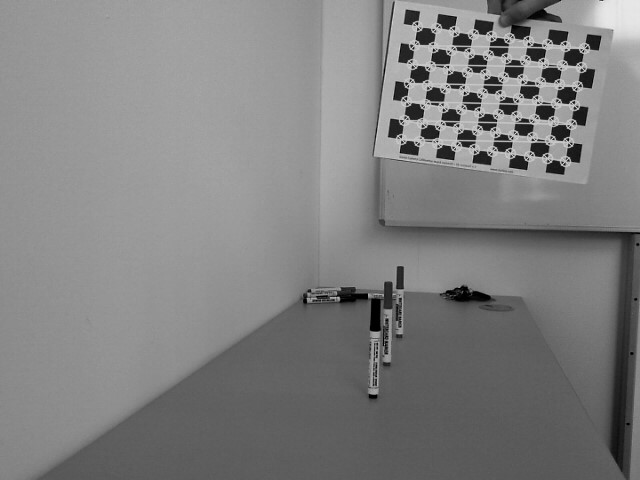
volovar_input
Input
volovar_3Dscene
Recovered 3D scene.
Posted on

Face recognition in video using Kinect v2 sensor

Michal Viskup

We detect and recognize the human faces in the video stream. Each face in the video is either recognized and the label is drawn next to their facial rectangle or it is labelled as unknown.

The video stream is obtained using Kinect v2 sensor. This sensor offers several data streams, we mention only the 2 relevant for our work:

  • RGB stream (resolution: 1920×1080, depth: 8bits)
  • Depth stream (resolution: 512×424, depth: 16bits)

The RGB stream is self-explanatory.  The depth stream consists of the values that denote the distance of the each pixel from the sensor.  The reliable distance lays between the 50 mms and extends to 8 meters. However, past the 4.5m mark, the reliability of the data is questionable. Kinect offers the methods that map the pixels from RGB stream to Depth stream and vice-versa.

We utilize the facial data from RGB stream for the recognition. The depth data is used to enhance the face segmentation through the nose-tip detection.

First of all, the face recognizer has to be trained. The training is done only once. The state of the trained recognizer can be persisted in xml format and reloaded in the future without the need for repeated training. OpenCV offers implementation of three face recognition methods:

  • Eigenfaces
  • Fisherfaces
  • Local Binary Pattern Histograms

We used the Eigenfaces and Fisherfaces method. The code for creation of the face recognizer follows:

void initRecognizer()
{
	Ptr<FaceRecognizer> fr;
	fr = createEigenFaceRecognizer();
	trainRecognizer();
}

It is simple as that. Face recognizer that uses the Fisherfaces method can be created accordingly. The Ptr interface ensures the correct memory management.

All the faces presented to such recognizer would be labelled as unknown. The recognizer is not trained yet. The training requires the two vectors:

  • The vector of facial images in the OpenCV Mat format
  • The vector of integer values containing the identifiers for the facial images

These vectors can be created manually. This however is not sufficient for processing the large training sets. We thus provide the automated way to create these vectors. Data for each subject should be placed in a separate directory. Directories containing the subject data should be places within the single directory (referred to as root directory). The algorithm is given an access to the root directory. It processes all the subject directories and creates both the vector images and the vector labels. We think that the Windows API for accessing the file system is inconvenient. On the other hand, UNIX based systems offer convenient C API through the Dirent interface. Visual Studio compiler lacks the dirent interface. We thus used an external library to gain access to this convenient interface (http://softagalleria.net/dirent.php). Following code requires the library to run:

First we obtain the list of subject names. These stand for the directory names within the root directory. The subject names are stored in the vector of string values. It can be initialized manually or using the text file.

Then, for each subject, the path to their directory is created:

std::ostringstream fullSubjectPath;
fullSubjectPath << ROOT_DIRECTORY_PATH;
fullSubjectPath << "\\";
fullSubjectPath << subjectName;
fullSubjectPath << "\\";

We then obtain the list of file names that reside within the subject directory:

std::vector<std::string> DataProvider::getFileNamesForDirectory(const std::string subjectDirectoryPath)
{
	std::vector<std::string> fileNames;
	DIR *dir;
	struct dirent *ent;
	if ((dir = opendir(subjectDirectoryPath.c_str())) != NULL) {
		while ((ent = readdir(dir)) != NULL) {
			if ((strcmp(ent->d_name, ".") == 0) || (strcmp(ent->d_name, "..") == 0))
			{
				continue;
			}
			fileNames.push_back(ent->d_name);
		}
		closedir(dir);
	}
	else {
		std::cout << "Cannot open the directory: ";
		std::cout << subjectDirectoryPath;
	}
	return fileNames;
}

Then, the images are loaded and stored in vector:

std::vector<std::string> subjectFileNames = getFileNamesForDirectory(fullSubjectPath.str());

std::vector<cv::Mat> subjectImages;
for (std::string fileName : subjectFileNames)
{
	std::ostringstream fullFileNameBuilder;
	fullFileNameBuilder << fullSubjectPath.str();
	fullFileNameBuilder << fileName;
	cv::Mat subjectImage = cv::imread(fullFileNameBuilder.str());
		subjectImages.push_back(subjectImage);
}
return subjectImages;

In the end, label vector is created:

for (int i = 0; i < subjectImages.size(); i++){
	trainingLabels.push_back(label);
}

With images and labels vectors ready, the training is a one-liner:

fr->train(images,labels);

The recognizer is trained. What we need now is a video and depth stream to recognize from.
Kinect sensor is initialized by the following code:

void initKinect()
{
	HRESULT hr;

	hr = GetDefaultKinectSensor(&kinectSensor);
	if (FAILED(hr))
	{
		return;
	}

	if (kinectSensor)
	{
		// Initialize the Kinect and get the readers
		IColorFrameSource* colorFrameSource = NULL;
		IDepthFrameSource* depthFrameSource = NULL;

		hr = kinectSensor->Open();

		if (SUCCEEDED(hr))
		{
			hr = kinectSensor->get_ColorFrameSource(&colorFrameSource);
		}

		if (SUCCEEDED(hr))
		{
			hr = colorFrameSource->OpenReader(&colorFrameReader);
		}

		colorFrameSource->Release();

		if (SUCCEEDED(hr))
		{
			hr = kinectSensor->get_DepthFrameSource(&depthFrameSource);
		}

		if (SUCCEEDED(hr))
		{
			hr = depthFrameSource->OpenReader(&depthFrameReader);
		}

		depthFrameSource->Release();
	}

	if (!kinectSensor || FAILED(hr))
	{
		return;
	}
}

The following function obtains the next color frame from Kinect sensor:

Mat getNextColorFrame()
{
	IColorFrame* nextColorFrame = NULL;
	IFrameDescription* colorFrameDescription = NULL;
	ColorImageFormat colorImageFormat = ColorImageFormat_None;

	HRESULT errorCode = colorFrameReader->AcquireLatestFrame(&nextColorFrame);
	if (!SUCCEEDED(errorCode))
	{
		Mat empty;
		return empty;
	}

	if (SUCCEEDED(errorCode))
	{
		errorCode = nextColorFrame->get_FrameDescription(&colorFrameDescription);
	}
	int matrixWidth = 0;
	if (SUCCEEDED(errorCode))
	{
		errorCode = colorFrameDescription->get_Width(&matrixWidth);
	}
	int matrixHeight = 0;
	if (SUCCEEDED(errorCode))
	{
		errorCode = colorFrameDescription->get_Height(&matrixHeight);
	}
	if (SUCCEEDED(errorCode))
	{
		errorCode = nextColorFrame->get_RawColorImageFormat(&colorImageFormat);
	}
	UINT bufferSize;
	BYTE *buffer = NULL;
	if (SUCCEEDED(errorCode))
	{
		bufferSize = matrixWidth * matrixHeight * 4;
		buffer = new BYTE[bufferSize];
		errorCode = nextColorFrame->CopyConvertedFrameDataToArray(bufferSize, buffer, ColorImageFormat_Bgra);
	}
	Mat frameKinect;
	if (SUCCEEDED(errorCode))
	{
		frameKinect = Mat(matrixHeight, matrixWidth, CV_8UC4, buffer);
	}
	if (colorFrameDescription)
	{
		colorFrameDescription->Release();
	}
	if (nextColorFrame)
	{
		nextColorFrame->Release();
	}

	return frameKinect;
}

Analogous function obtains the next depth frame. The only change is the type and size of the buffer, as the depth frame is single channel 16 bit per pixel.
Finally, we are all set to do the recognition. The face recognition task consists of the following steps:

  1. Detect the faces in video frame
  2. Crop the faces and process them
  3. Predict the identity

For face detection, we use OpenCV CascadeClassifier. OpenCV provides the extracted features for the classifier for both the frontal and the profile faces. However, in video both the slight and major variations from these positions are present. We thus increase the tolerance for the false positives to prevent the cases when the track of the face is lost between the frames.
The classifier is simply initialized by loading the set of features using its load function.

CascadeClassifier cascadeClassifier;
cascadeClassifier.load(PATH_TO_FEATURES_XML);

The face detection is done as follows:

vector<Mat> getFaces(const Mat frame, vector<Rect_<int>> &rectangles)
{
	Mat grayFrame;
	cvtColor(frame, grayFrame, CV_BGR2GRAY);

	cascadeClassifier.detectMultiScale(grayFrame, rectangles, 1.1, 5);

	vector<Mat> faces;
	for (Rect_<int> face : rectangles){
		Mat detectedFace = grayFrame(face);
		Mat faceResized;
		resize(detectedFace, faceResized, Size(240, 240), 1.0, 1.0, INTER_CUBIC);
		faces.push_back(faceResized);
	}
	return faces;
}

With faces detected, we are set to proceed to recognition. The recognition process is as follows:

Mat colorFrame = getNextColorFrame();
vector<Rect_<int>> rectangles;
vector<Mat> faces = getFaces(colorFrameResized, rectangles);
int label = -1;
label = fr->predict(face);
string box_text = format("Prediction = %d", label);
putText(originalFrame, box_text, Point(rectangles[i].tl().x, rectangles[i].tl().y), FONT_HERSHEY_PLAIN, 1.0, CV_RGB(0, 255, 0), 2.0);

Nose tip detection is done as follows:

unsigned short minReliableDistance;
unsigned short maxReliableDistance;
Mat depthFrame = getNextDepthFrame(&minReliableDistance, &maxReliableDistance);
double scale = 255.0 / (maxReliableDistance - minReliableDistance);
depthFrame.convertTo(depthFrame, CV_16UC1, scale);

// detect nose tip
// only search for the nose tip in the head area
Mat deptHeadRegion = depthFrame(rectangles[i]);
			
// Nose is probably the local minima in the head area
double min, max;
Point minLoc, maxLoc;
minMaxLoc(deptHeadRegion, &min, &max, &minLoc, &maxLoc);
	minLoc.x += rectangles[i].x;
	minLoc.y += rectangles[i].y;

// Draw the circle at proposed nose position.
circle(depthFrame, minLoc, 5, 255, -1);

To conclude, we provide a simple implementation that allows the detection and recognition of human faces within a video. The room for improvement is that rather than allowing more false positives in detection phase, the detected nose tip can be used for face tracking.
Posted on

Stereo reconstruction

Ondrej Galbavy

This example presents straightforward process to determine depth of points (sparse depth map) from stereo image pair using stereo reconstruction. Example is implemented in Python 2.

Stereo calibration process

We need to obtain multiple stereo pairs with chessboard shown on both images.

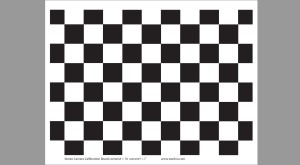
galbavy_chessboard
Chessboard
galbavy_chessboard_pattern
Detected chessboard pattern
  1. For each stereo pair we need to do:
    1. Find chessboard: cv2.findChessboardCorners
    2. Find subpixel coordinates: cv2.cornerSubPix
    3. If both chessboards are found, store keypoints
    4. Optionally draw chessboard pattern on image
  2. Compute calibraton: cv2.stereoCalibrate
    1. We get:
      1. Camera matrices and distortion coefficients
      2. Rotation matrix
      3. Translation vector
      4. Essential and fundamental matrices
  3. Store calibration data for used camera setup
        for paths in calib_files:
            
            left_img = cv2.imread(paths.left_path, cv2.CV_8UC1)
            right_img = cv2.imread(paths.right_path, cv2.CV_8UC1)
    
            image_size = left_img.shape
    
            find_chessboard_flags = cv2.CALIB_CB_ADAPTIVE_THRESH | cv2.CALIB_CB_NORMALIZE_IMAGE | cv2.CALIB_CB_FAST_CHECK
    
            left_found, left_corners = cv2.findChessboardCorners(left_img, pattern_size, flags = find_chessboard_flags)
            right_found, right_corners = cv2.findChessboardCorners(right_img, pattern_size, flags = find_chessboard_flags)
    
            if left_found:
                cv2.cornerSubPix(left_img, left_corners, (11,11), (-1,-1), (cv2.TERM_CRITERIA_EPS + cv2.TERM_CRITERIA_MAX_ITER, 30, 0.1))
            if right_found:
                cv2.cornerSubPix(right_img, right_corners, (11,11), (-1,-1), (cv2.TERM_CRITERIA_EPS + cv2.TERM_CRITERIA_MAX_ITER, 30, 0.1))
    
            if left_found and right_found:
                img_left_points.append(left_corners)
                img_right_points.append(right_corners)
                obj_points.append(pattern_points)
    
            cv2.imshow("left", left_img)
            cv2.drawChessboardCorners(left_img, pattern_size, left_corners, left_found)
            cv2.drawChessboardCorners(right_img, pattern_size, right_corners, right_found)
    
            cv2.imshow("left chess", left_img)
            cv2.imshow("right chess", right_img)
    
        stereocalib_criteria = (cv2.TERM_CRITERIA_MAX_ITER + cv2.TERM_CRITERIA_EPS, 100, 1e-5)
        stereocalib_flags = cv2.CALIB_FIX_ASPECT_RATIO | cv2.CALIB_ZERO_TANGENT_DIST | cv2.CALIB_SAME_FOCAL_LENGTH | cv2.CALIB_RATIONAL_MODEL | cv2.CALIB_FIX_K3 | cv2.CALIB_FIX_K4 | cv2.CALIB_FIX_K5
        stereocalib_retval, cameraMatrix1, distCoeffs1, cameraMatrix2, distCoeffs2, R, T, E, F =        cv2.stereoCalibrate(obj_points,img_left_points,img_right_points,image_size,criteria = stereocalib_criteria, flags = stereocalib_flags)
    

Stereo rectification process

We need to:

  1. Compute rectification matrices: cv2.stereoRectify
  2. Prepare undistortion maps for both cameras: cv2.initUndistortRectifyMap
  3. Remap each image: cv2.remap
rectify_scale = 0 # 0=full crop, 1=no crop
R1, R2, P1, P2, Q, roi1, roi2 = cv2.stereoRectify(data["cameraMatrix1"], data["distCoeffs1"], data["cameraMatrix2"], data["distCoeffs2"], (640, 480), data["R"], data["T"], alpha = rectify_scale)
left_maps = cv2.initUndistortRectifyMap(data["cameraMatrix1"], data["distCoeffs1"], R1, P1, (640, 480), cv2.CV_16SC2)
right_maps = cv2.initUndistortRectifyMap(data["cameraMatrix2"], data["distCoeffs2"], R2, P2, (640, 480), cv2.CV_16SC2)

for pair in pairs:
    left_img_remap = cv2.remap(pair.left_img, left_maps[0], left_maps[1], cv2.INTER_LANCZOS4)
    right_img_remap = cv2.remap(pair.right_img, right_maps[0], right_maps[1], cv2.INTER_LANCZOS4)
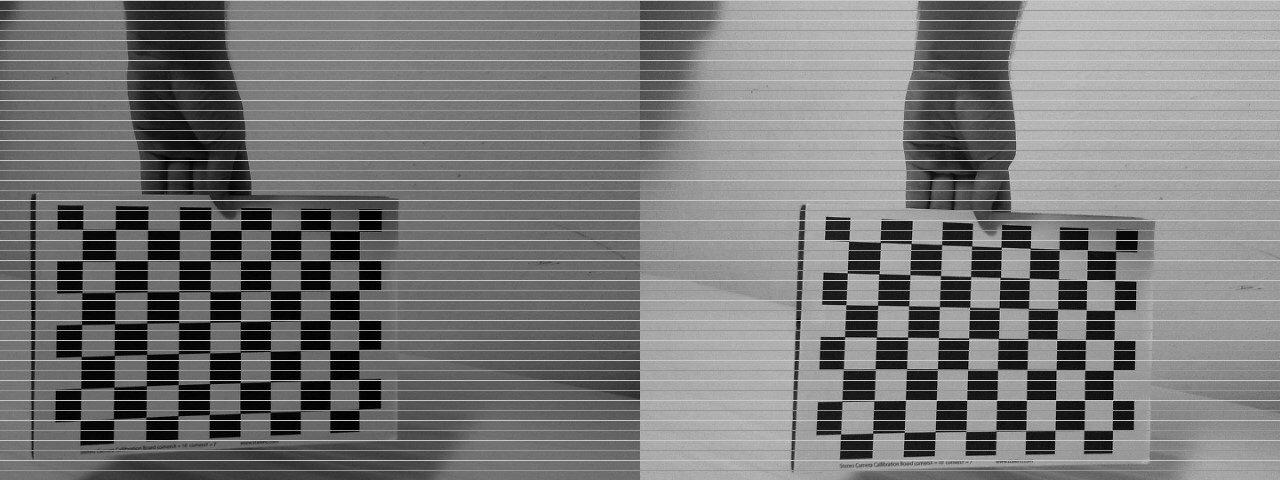
galbavy_chessboard_raw
Raw images
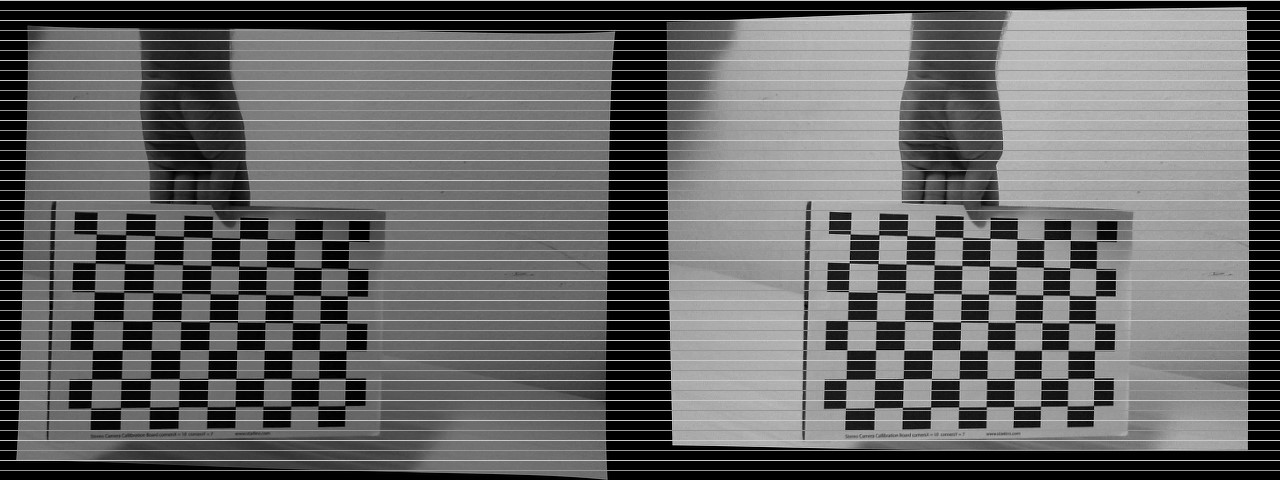
galbavy_chessboard_rectified
Rectified images with no crop

Stereo pairing

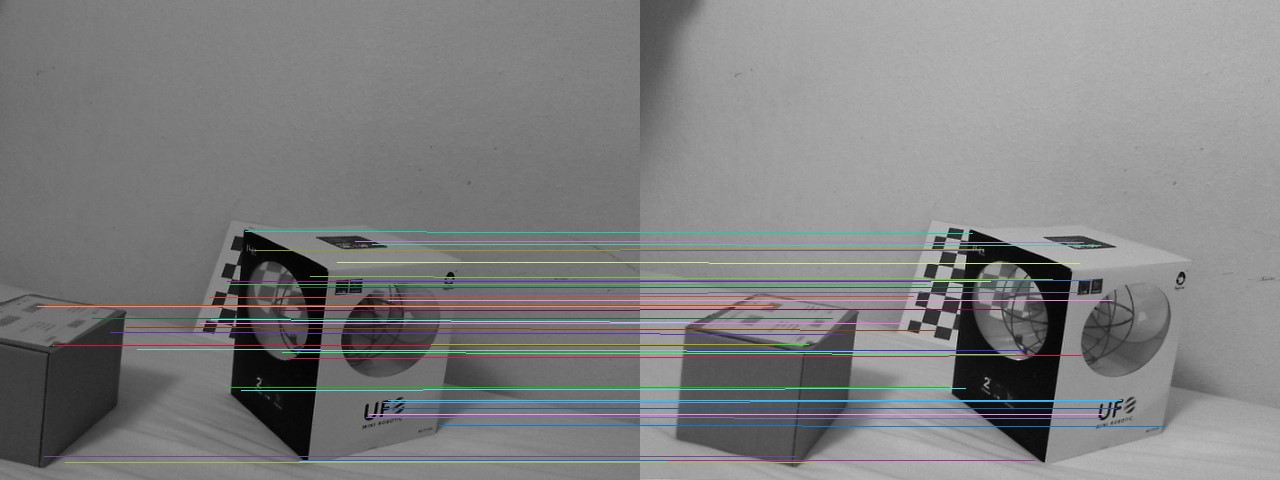
Standard object matching: keypoint detection (Harris, SIFT, SURF,…), descriptor extractor (SIFT, SURF) and matching (Flann, brute force,…).  Matches are filtered for same line coordinates to remove mismatches.

detector = cv2.FeatureDetector_create("HARRIS")
extractor = cv2.DescriptorExtractor_create("SIFT")
matcher = cv2.DescriptorMatcher_create("BruteForce")

for pair in pairs:
    left_kp = detector.detect(pair.left_img_remap)
    right_kp = detector.detect(pair.right_img_remap)
    l_kp, l_d = extractor.compute(left_img_remap, left_kp)
    r_kp, r_d = extractor.compute(right_img_remap, right_kp)
    matches = matcher.match(l_d, r_d)
    sel_matches = [m for m in matches if abs(l_kp[m.queryIdx].pt[1] - r_kp[m.trainIdx].pt[1]) &lt; 3]
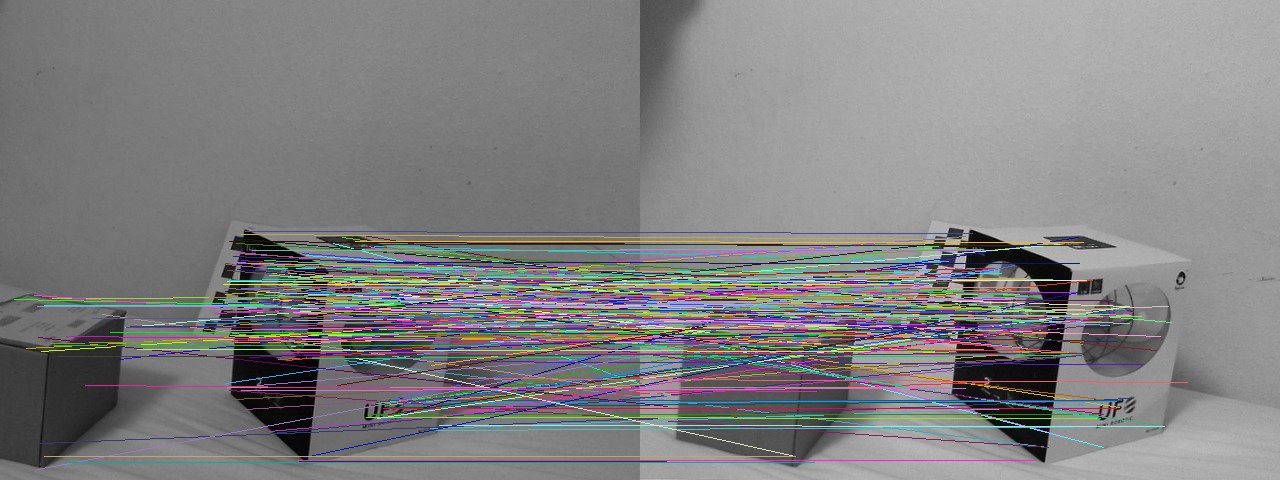
galbavy_keypoint_matches
Raw keypoint matches on cropped rectified images
galbavy_same_matches
Same line matches

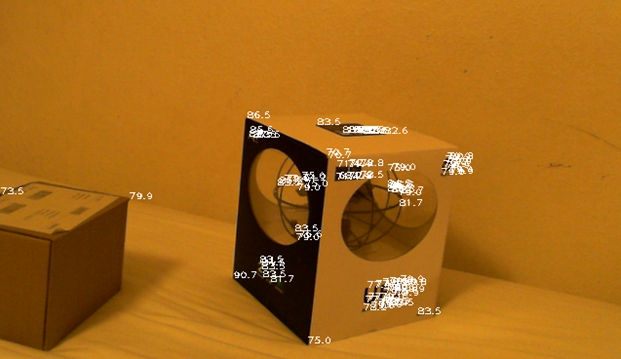
Triangulation

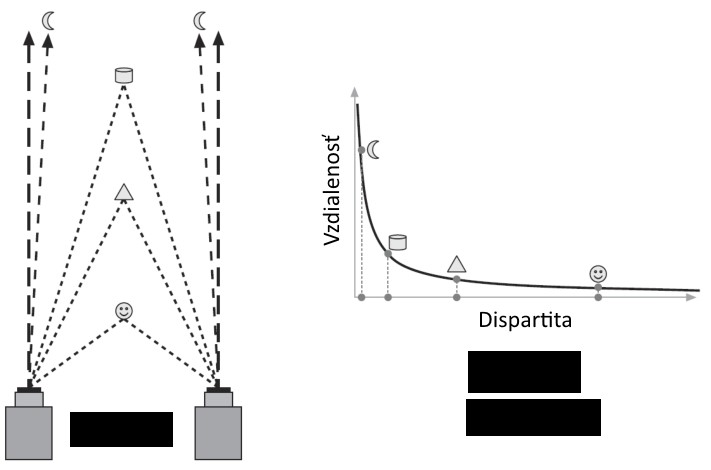
How do we get depth of point? Dispartity is difference of x coordinate of the same keypoint in both images. Closer points have greater dispartity and far points have almost zero dispartity. Depth can be defined as:

galbavy_equation

Where:

  • f – focal length
  • T – baseline – distance of cameras
  • x1, x2 – x coordinated of same keypoint
  • Z – depth of point
for m in sel_matches:
        left_pt = l_kp[m.queryIdx].pt
        right_pt = r_kp[m.trainIdx].pt
        dispartity = abs(left_pt[0] - right_pt[0])
        z = triangulation_constant / dispartity
galbavy_disparity
Dispartity illustration

Result

Stereo
Resulting depth in centimeters of keypoints
Posted on

SIFT in RGB-D (Object recognition)

Marek Jakab

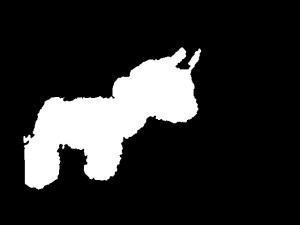
In this example we focus on enhancing the current SIFT descriptor vector with additional two dimensions using depth map information obtained from kinect device. Depth map is used for object segmentation (see: http://vgg.fiit.stuba.sk/2013-07/object-segmentation/) as well to compute standard deviation and the difference of minimal and maximal distance from surface around each of detected keypoints. Those two metrics are used to enhance SIFT descriptor.

Functions used: FeatureDetector::detect, DescriptorExtractor::compute, RangeImage∷calculate3DPoint

The process

For extracting normal vector and compute mentioned metrics from the keypoint we use OpenCV and PCL library. We are performing selected steps:

  1. Perform SIFT keypoint localization at selected image & mask
  2. Extract SIFT descriptors
    // Detect features and extract descriptors from object intensity image.
    if (siftGpu.empty())
    {
    	featureDetector->detect(intensityImage, objectKeypoints, mask);
    	descriptorExtractor->compute(intensityImage, objectKeypoints, objectDescriptors);
    }
    else
    {
    	runSiftGpu(siftGpu, maskedIntensityImage, objectKeypoints, objectDescriptors, mask);
    }
    
    
  3. For each descriptor
    1. From surface around keypoint position:
      1. Compute standard deviation
      2. Compute difference of minimal and maximal distances (based on normal vector)
    2. Append new information to current descriptor vector
    for (int i = 0; i < keypoints.size(); ++i)
    {
    	if (!rangeImage.isValid((int)keypoints[i].x, (int)keypoints[i].y))
    	{
    		setNullDescriptor(descriptor);
    		continue;
    	}
    	rangeImage.calculate3DPoint(keypoints[i].x, keypoints[i].y, point_in_image.range, keypointPosition);
    	sufraceSegmentPixels = rangeImage.getInterpolatedSurfaceProjection(transformation, segmentPixelSize, segmentWorldSize);
    	rangeImage.getNormal((int)keypoints[i].x, (int)keypoints[i].y, 5, normal);
    	for (int j = 0; j < segmentPixelsTotal; ++j)
    	{
    		if (!pcl_isfinite(sufraceSegmentPixels[j]))
    			sufraceSegmentPixels[j] = maxDistance;
    	}
    	cv::Mat surfaceSegment(segmentPixelSize, segmentPixelSize, CV_32FC1, (void *)sufraceSegmentPixels);
    	extractDescriptor(surfaceSegment, descriptor);
    }
    
    
    void DepthDescriptor::extractDescriptor(const cv::Mat &segmentSurface, float *descriptor)
    {
    	cv::Scalar mean;
    	cv::Scalar standardDeviation;
    	meanStdDev(segmentSurface, mean, standardDeviation);
    
    	double min, max;
    	minMaxLoc(segmentSurface, &min, &max);
    
    	descriptor[0] = float(standardDeviation[0]);
    	descriptor[1] = float(max - min);
    }


Inputs

jakab_input
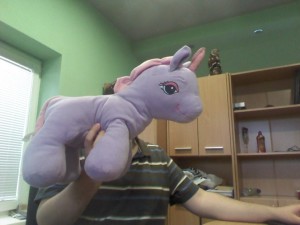
The color image
jakab_mask
The mask from segmented object.

Output

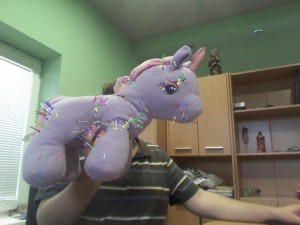
To be able to enhance SIFT descriptor and still provide good matching results, we need to evaluate the precision of selected metrics. We have chosen to visualize the normal vectors computed from the surface around keypoints.

jakab_output
Normal vector visualisation
Posted on

Structure from Motion

Jan Handzus

Main objective of this project was to reconstruct the 3D scene from set of images or recorded video. First step is to find relevant matches between two related images and use this matches to calculate rotation and translation of camera for each input image or frame. In final stage the depth value is extracted with triangulation algorithm.

INPUT

handzus_input

THE PROCESS

  1. Find features in two related images:
    SurfFeatureDetector detector(400);
    detector.detect(actImg, keypoints1);
    detector.detect(prevImg, keypoints2);
    
  2. Create descriptors for features:
    SurfDescriptorExtractor extractor(48, 18, true);
    extractor.compute(actImg, keypoints1, descriptors1);
    extractor.compute(prevImg, keypoints2, descriptors2);
    
  3. Pair descriptors between two images and find relevant matches:
    BFMatcher matcher(NORM_L2);
    matcher.match(descriptors1, descriptors2, featMatches);
    
  4. After we have removed the irrelevant key-points we need to extract the fundamental matrix:
    vector<Point2f> pts1,pts2;
    keyPointsToPoints(keypoints1, pts1);
    keyPointsToPoints(keypoints2, pts2);
    Fundamental = findFundamentalMat(pts1, pts2, FM_RANSAC, 0.5, 0.99, status);
    
  5. Calculate the essential matrix:
    Essential = (K.t() * Fundamental * K);
    

    K…. the camera calibration matrix.

  6. First camera matrix is on starting position therefore we must calculate second camera matrix P1:
    SVD svd(Essential, SVD::MODIFY_A);
    Mat svd_u = svd.u;
    Mat svd_vt = svd.vt;
    Mat svd_w = svd.w;
    Matx33d W(0, -1, 0,
    	1, 0, 0,
    	0, 0, 1);
    //Rotation
    Mat_<double> R = svd_u * Mat(W) * svd_vt;
    //Translation
    Mat_<double> t = svd_u.col(2);
    
  7. Find depth value for each matching point:
    //Make A matrix.
    Matx43d A(u.x*P(2, 0) - P(0, 0), u.x*P(2, 1) - P(0, 1), u.x*P(2, 2) - P(0, 2),
    	u.y*P(2, 0) - P(1, 0), u.y*P(2, 1) - P(1, 1), u.y*P(2, 2) - P(1, 2),
    	u1.x*P1(2, 0) - P1(0, 0), u1.x*P1(2, 1) - P1(0, 1), u1.x*P1(2, 2) - P1(0, 2),
    	u1.y*P1(2, 0) - P1(1, 0), u1.y*P1(2, 1) - P1(1, 1), u1.y*P1(2, 2) - P1(1, 2)
    	);
    //Make B vector.
    Matx41d B(-(u.x*P(2, 3) - P(0, 3)),
    	-(u.y*P(2, 3) - P(1, 3)),
    	-(u1.x*P1(2, 3) - P1(0, 3)),
    	-(u1.y*P1(2, 3) - P1(1, 3)));
    //Solve X.
    Mat_<double> X;
    solve(A, B, X, DECOMP_SVD);
    return X;
    SVD svd(Essential, SVD::MODIFY_A);
    Mat svd_u = svd.u;
    Mat svd_vt = svd.vt;
    Mat svd_w = svd.w;
    Matx33d W(0, -1, 0,
    	1, 0, 0,
    	0, 0, 1);
    //Rotation
    Mat_<double> R = svd_u * Mat(W) * svd_vt;
    //Translation
    Mat_<double> t = svd_u.col(2
    

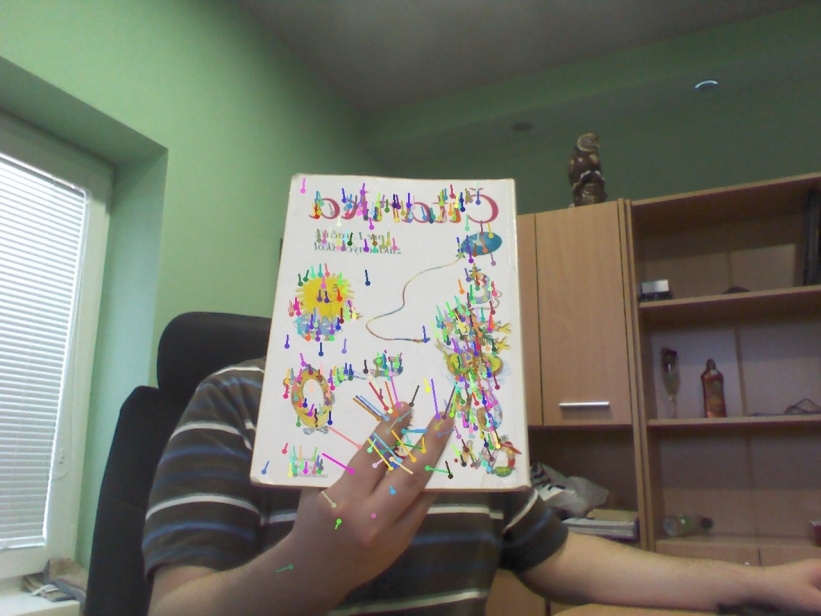
SAMPLE

handzus_sample

CONCLUSION

We have successfully extracted the depth value for each relevant matching point. But we were not able to visualise the result because of the PCL and other external libraries. In future we try to use Matlab to validate our result.


SOURCES

http://packtlib.packtpub.com/library/9781849517829/ch04
http://www.morethantechnical.com/2012/02/07/structure-from-motion-and-3d-reconstruction-on-the-easy-in-opencv-2-3-w-code/

Posted on

Object segmentation

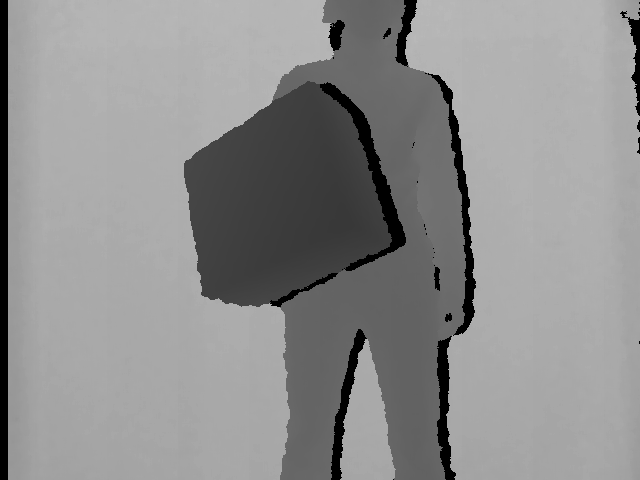
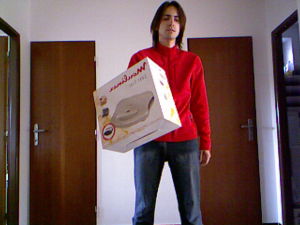
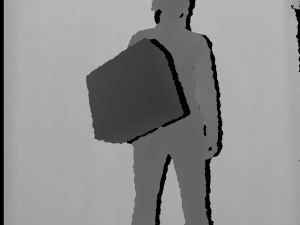
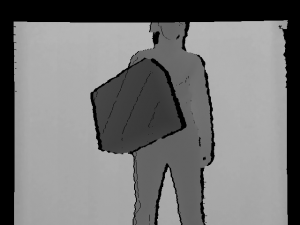
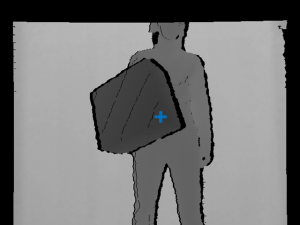
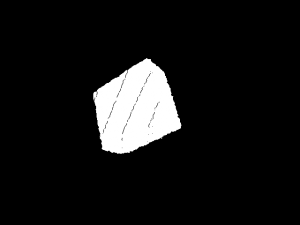
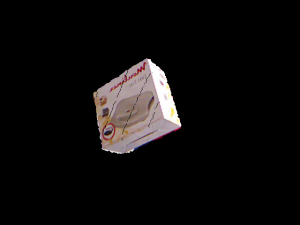
This example shows how to segment objects using OpenCV and Kinect for XBOX 360. The depth map retrieved from Kinect sensor is aligned with color image and used to create segmentation mask.

Functions used: convertTo, floodFill, inRange, copyTo

Inputs

The color image
The depth map

The process

  1. Retrieve color image and depth map
  2. Compute coordinates of depth map pixels so they fit to color image
  3. Align depth map with color image
    cv::Mat depth32F;
    depth16U.convertTo(depth32F, CV_32FC1);
    cv::inRange(depth32F, cv::Scalar(1.0f), cv::Scalar(1200.0f), mask);
    
  4. Find seed point in aligned depth map
  5. Perform flood fill operation from seed point
    cv::Mat mask(cv::Size(colorImageWidth + 2, colorImageHeight + 2), CV_8UC1, cv::Scalar(0));
    floodFill(depth32F, mask, seed, cv::Scalar(0.0f), NULL, cv::Scalar(20.0f), cv::Scalar(20.0f), cv::FLOODFILL_MASK_ONLY);
  6. Make a copy of color image using mask
    cv::Mat color(cv::Size(colorImageWidth, colorImageHeight), CV_8UC4, (void *) colorImageFrame->pFrameTexture, colorImageWidth * 4);
    color.copyTo(colorSegment, mask(cv::Rect(1, 1, colorImageWidth, colorImageHeight)));
    

Sample

The depth map aligned with color image
Finding the seed point
The mask – result of the flood fill operation

Result

The result of segmentation process